


2.) Training Phase
Making it to Basecamp
The Training Phase is basically a dry run for the Protein Story Phase. You will learn some basic protein structure science, practice reading a science paper, explore a protein structure and "design" a protein model for 3D printing.
The Training Phase will focus on an example protein called a Zinc Finger, and is broken down into four main sections:
- Introduction to Protein Structure
- The Structure and Function of Zinc Finger Proteins
- Designing and 3D Printing a Zinc Finger Protein Model
- Presenting Your Work
Recommended Models for the Training Phase
The MAPS program revolves around using physical models as teaching tools. So if at all possible, we encourage you to use the recommeneded models below for this training phase section.
All recommended models are available to borrow free of charge through the MSOE Lending Library, or are available for purchase through 3D Molecular Designs. Use the discount code below to receive a 10% MAPS discount on your 3D Molecular Designs purchases.

1. Introduction to Protein Structure
Proteins are some of the most amazing molecules known to exist. They come in a huge variety of shapes and sizes, with each type of protein specifically shaped to perform a unique task.
Understanding basic protein structure and function concepts will be a crucial skill needed to design a 3D printed protein model as part of your MAPS project.
Below is a collection of expandable content that will introduce key protein structure concepts.
What is a Protein?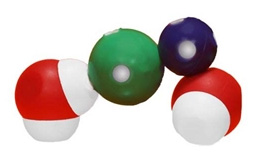
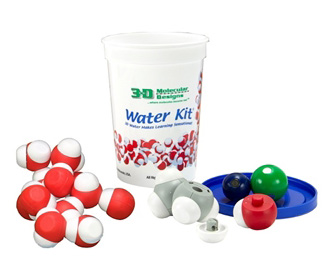
To truly understand how proteins fold into the specific shapes that allow them to carry out their important functions, we need to first explore water and some of the basic principles of chemistry that define life on Earth.
This will be a lot more fun with the use of physical models! So if at all possible, we encourage you to use the Water Kit for this section.
- The Water Kit is available to borrow (free of charge) as part of the "Introduction to Protein Structure Collection" from the MSOE Lending Library.
- The Water Kit is available to purchase from the company 3D Molecular Designs.
Take your time with these activities! There is a lot to think about. Don’t be afraid to ask each other questions, as the more you question, the more you learn! The links below will provide you with additional activities to help you work with the Water Kit, and the video below will summarize the key attributes of water as they relate to protein structure.
Summary of Water
Summary video on the key points of water
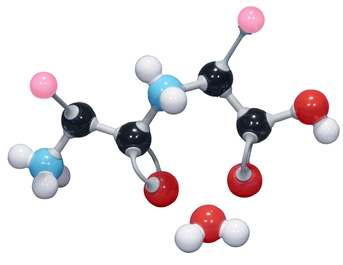
Proteins are long strands of amino acids that fold into complex 3-dimensional shapes in the watery environment of our cells. So the final shape of a protein is a direct result of the basic principles of chemistry you explored with the Water Kit.
To really understand protein folding, we need to appreciate the structure of individual amino acids and how they link together to form long protein chains. The Amino Acid Building Block Kit models are a great tool for this exploration.
- The Amino Acid Building Block Kit is available to borrow (free of charge) as part of the "Introduction to Protein Structure Collection" from the MSOE Lending Library.
- The Amino Acid Building Block Kit is available to purchase from the company 3D Molecular Designs.
The links below will provide you with additional activities to help you work with the Amino Acid Building Block Kit.
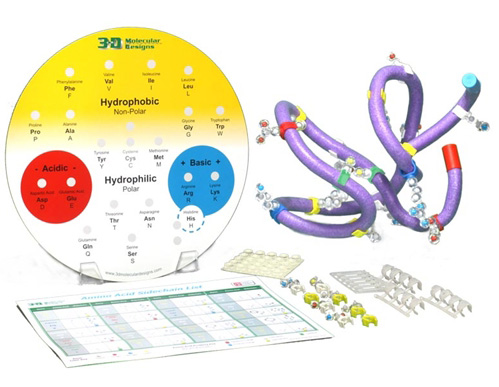
Protein chains of amino acids fold into complex 3-dimensional shapes following basic principles of chemistry.. The Amino Acid Starter Kit is a great tool for this exploration.
- The Amino Acid Starter Kit is available to borrow (free of charge) as part of the "Introduction to Protein Structure Collection" from the MSOE Lending Library.
- The Amino Acid Starter Kit is available to purchase from the company 3D Molecular Designs.
The links below will provide you with additional activities to help you work with the Amino Acid Starter Kit, and the videos below will summarize the key attributes of protein folding.
- Amino Acid Starter Kit Brief
- Full Amino Acid Starter Kit Lesson
- Additional Amino Acid Starter Kit Resources
Summary of Protein Folding
Summary video on the key points of protein folding
2. The Structure and Function of Zinc Finger Proteins
Once you are comfortable with basic protein structure, you can dive into a specific molecular story. For the Training Phase, we will be focused on Zinc Fingers, a large family of proteins that regulate protein synthesis.
Below is a collection of expandable content that will introduce zinc fingers, their structure, and how they function.
What is a Zinc Finger?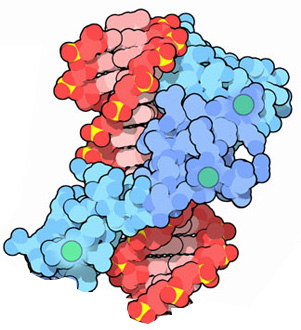
Zinc Fingers are one of the most diverse families of proteins in the human body. They are relatively small proteins, some only ~30 amino acids long, but play a crucial role in regulating transcription (the copying of DNA into RNA).
The RCSB Protein Data Bank is an international database of protein structures, and contains thousands of Zinc Finger structures. Visit their Zinc Finger Molecule of the Month article for a nice overview of this amazing protein.
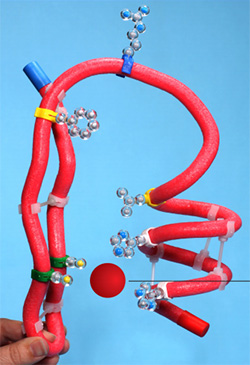
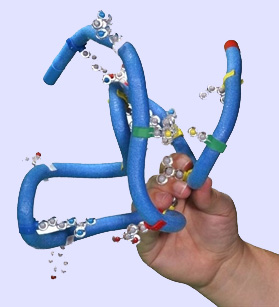
One thing all zinc finger structures have in common is a simple fold, sometimes referred to as the "Zinc Finger Motif". It is comprised of one small alpha helix and two strands of beta sheet that fold next to each other. These secondary structures are then held in place by a single zinc atom, giving the protein its name.
A Zinc Finger Motif model can be created using the Amino Acid Starter Kit we used earlier in the Protein Structure section. You can find instructions for this activity here, and can obtain the Amino Acid Starter Kit using the options below.
- The Amino Acid Starter Kit is available to borrow (free of charge) as part of the "Introduction to Protein Structure Collection" from the MSOE Lending Library.
- The Amino Acid Starter Kit is available to purchase from the company 3D Molecular Designs.
Click Here for a review of protein secondary structures, alpha helices and beta pleated sheets.
Once you have studied the basics of a specific protein and have read a scientific journal article about it, you are ready to define your protein story.
Your protein story is basically the structure-function story you want your 3D printed protein model to communicate. In other words, your protein story should directly relate to the job your protein does, and explain how the shape of the protein allows it to do that job.
Your MAPS Team will want to have a clear idea of what this story is before you start your model design. And one of the best ways to define your protein story is to write a scientific abstract.
Abstracts are, by definition, short. You might want to start with one sentence for each of the sections listed below, and then add additional sentences as needed.
- Introduction: What is the overall relevance of your protein of interest?
- Question: What is the particular story of your protein that your team will model?
- Findings: What answers to your question were you able to determine through your modeling project? Be specific as to what structural elements your team has modeled and how they are relevant to your story.
- Conclusion: How do your findings relate to the big picture? What important questions related to your protein story are still being actively researched?
3. Designing and 3D Printing a Zinc Finger Protein Model
Once you are comfortable with zinc finger proteins and have defined the specific molecular story you want to tell, you are ready to find a protein structure file of a zinc finger, and design a 3D printed model of it. This 3D printed model is a key component of your MAPS project and will be used to help communicate your protein story at your capstone event.
Below is a collection of expandable content that will introduce Jmol, the molecular visualization program used by MAPS Teams to create protein models, and the processes of "designing" a protein model.
What Does it Mean to "Design" a Protein Model?How to Approach Your Model Design
Tim Herman, PhD Explains How to Approach Your Model Design in Jmol
All 3D printed protein models made in the MAPS program are designed using the program Jmol. You start with a protein structure file (.PDB file), which contains the 3D locations of all of the atoms that make up the protein. Using the Jmol commands you will learn below, you can then edit the way the protein is displayed, hiding some atoms, changing display formats and customizing colors. When happy with your design, you can export your protein model from Jmol in file formats suitable for 3D printing.
We have created a detailed Jmol Training Guide that will cover everything you need to know to design and build your model. The Jmol Training Guide is broken down into four main sections, which we strongly recommend you explore in order until you are comfortable with Jmol and designing protein models for 3D printing.
- 1) Getting Started:
- Accessing Jmol
- Loading Structures
- Saving and Reloading - 2) Simplifying Your Protein:
- Exploring the Structure
- Focusing on the Backbone - 3) Adding the Details:
- Adding Sidechains
- Adding Ligands
- Adding Molecular Bonds - 4) 3D Printing Your Design:
- Adding Support Struts
- Checking Your Design
- Print it Yourself
- Pay Someone Else to Print it
The decisions you make when designing your model are directly linked to the protein story you want to tell.
In this way, there is no single "right" model design for any given protein, but rather a variety of potential model designs that each help tell a specific story about the protein you are studying.
For example, below are three potential zinc finger models, each designed to tell a different protein story related to zinc fingers.
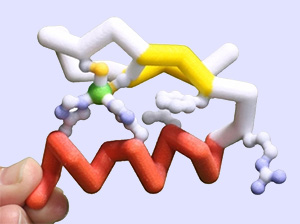
Design 1 - The Zinc Finger Motif
Protein Story: Zinc Fingers are usually comprised of 2-5 repeats of the "zinc finger motif". This motif contains a short alpha helix (red) positioned next to two beta strands (yellow) that are held together by a zinc ion (green) interacting with two histidine and two cysteine amino acid sidechains.
Click here to see the Jmol commands used for this design
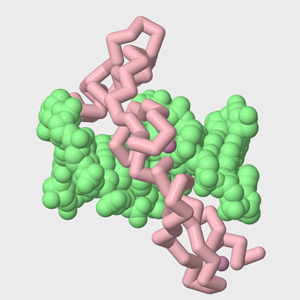
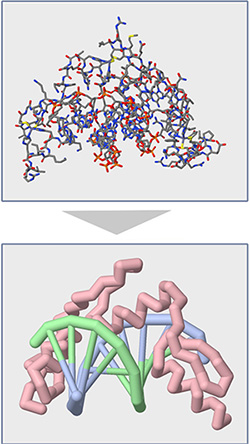
Design 2 - The Major Groove of DNA
Protein Story: Zinc Finger proteins regulate transcription (the copying of genes from DNA into RNA), a key step in building proteins. A zinc finger (red) will do this by binding to the major groove in a section of double-stranded DNA (green).
Click here to see the Jmol commands used for this design
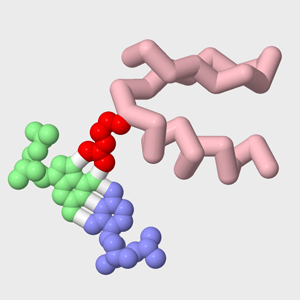
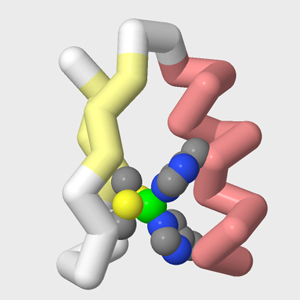
Design 3 - Basepair Specificity
Protein Story: Zinc Fingers bind to DNA in a sequence-specific way, meaning they only bind to the correct sequence of DNA basepairs (A's, T's, G's and C's). There is a key amino acid sidechain on every zinc finger motif (bright red) that identifies and interacts with each DNA basepair (green and blue).
Click here to see the Jmol commands used for this design
Note that each design is uses the same Zinc Finger protein structure (1zaa.pdb), but communicates a different unique aspect or story about zinc finger proteins. In this way, you will be designing a specific protein model that is ideally suited to communicate the specific protein story your team has defined.
4. Presenting Your Work
The final step in a MAPS Project is to present your work at a capstone experience.
Your 3D printed model will be the main tool you use to present your project and tell your protein story. But there are a variety of complimentary items you may also choose to develop, including:
- Posters
- Oral Presentations
- Videos
- Web pages
- Model Description Sheets
Click Here to learn more about the Presentation Experience, or to practice developing some of these complimentary items to go with your practice zinc finger protein story and 3D printed model.
Moving to the Next Phase
Once your team has finished the training phase, move on the Protein Story Phase. Or if you have decided to use Zinc Fingers for your main project and skip the Protein Story Phase, move directly on to your Capstone Event.